Classic Homemade Brownies: An Amazing Ultimate Recipe
Classic Homemade Brownies are a timeless dessert that promises to deliver sheer chocolate bliss in every bite. Rich, fudgy, and deeply satisfying, these brownies have a way of making any occasion a little sweeter. Whether you’re celebrating a special event or simply indulging in a quiet night at home, this brownie recipe will not disappoint. The incredible aroma of chocolate wafting through your kitchen is just the beginning of an amazing experience.
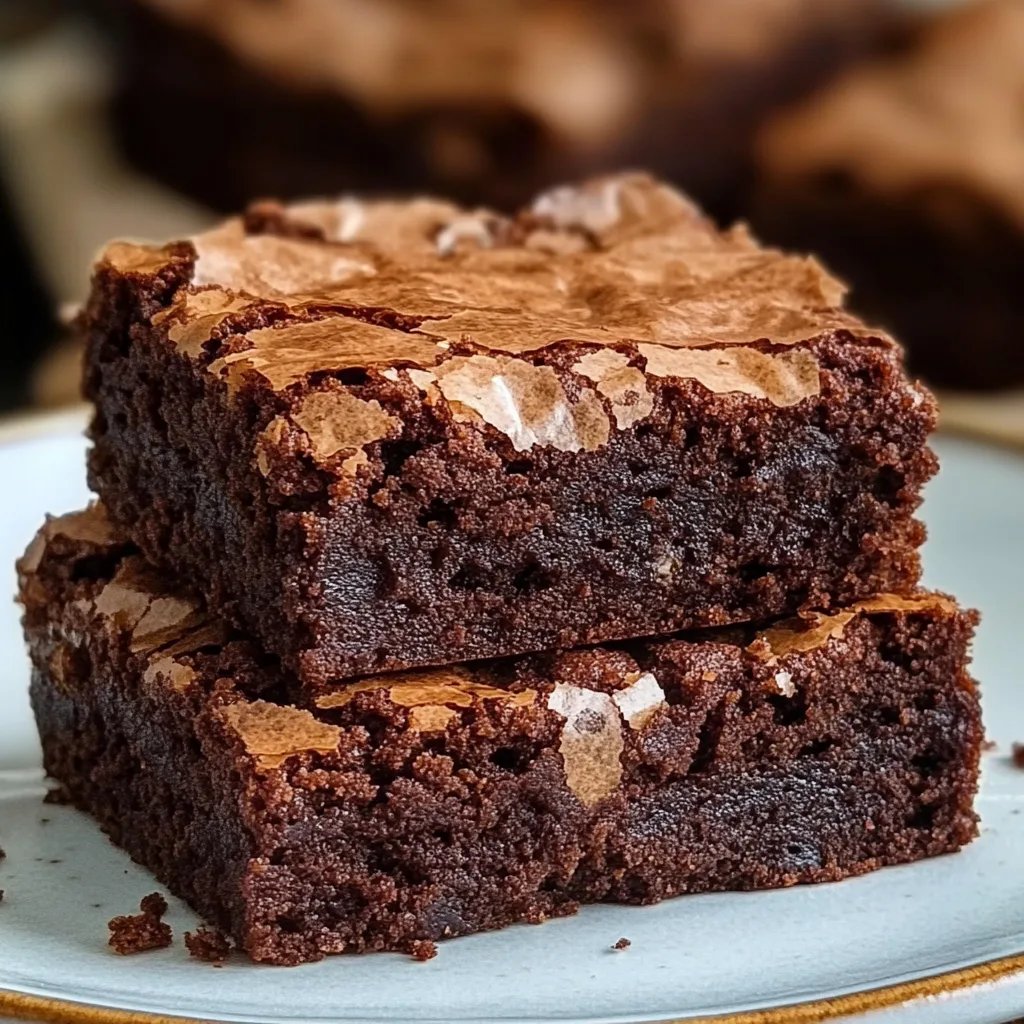
If you’ve ever savored a gooey, chocolatey brownie, you understand the pull of this classic treat. These brownies are not just good—they’re simply out of this world! With their rich texture and deep flavors, they capture the hearts of chocolate lovers everywhere. The layering of soft chocolate, hints of vanilla, and a touch of sweetness makes these brownies a staple in many homes.
Let’s dive deeper into what makes Classic Homemade Brownies an essential recipe for every baker. In this guide, you will uncover the reasons why this recipe is so beloved, how to prepare it with ease, and tips on serving these delightful treats to make every occasion special.
Why You’ll Love This Recipe
Classic Homemade Brownies combine simple yet flavorful ingredients that create an incredible dessert. Here are several reasons why this recipe will become a favorite in your kitchen:
1. Simplicity – The ingredients are basic and commonly found in most pantries, making it convenient for anyone to whip up.
2. Rich Flavor – The combination of cocoa powder and chocolate chips results in a decadent taste that is hard to resist.
3. Customizable – You can easily add nuts, caramel, or even espresso powder for a unique twist on the classic flavor.
4. Perfect Texture – These brownies offer a fudgy center with a slightly crispy top that balances perfectly.
5. Ideal for Sharing – Whether at gatherings or family dinners, brownies are a crowd-pleaser and easy to share.
6. Quick Preparation – With a simple preparation process, you’ll have your brownies ready in no time.
With these delightful factors at play, it’s easier to see why Classic Homemade Brownies hold a special place in the hearts of many. They are not just a dish; they’re a treasured experience meant to be enjoyed and shared.
Preparation and Cooking Time
The preparation and cooking of Classic Homemade Brownies can be done swiftly, allowing you to enjoy this treat without too much time in the kitchen. Here’s an overview of the time commitment involved:
– Preparation Time: 15 minutes
– Cooking Time: 25–30 minutes
– Cooling Time: 20 minutes
Overall, you’ll be looking at about 1 hour from start to finish. This quick timeline makes it easy to squeeze brownie-making into your day, no matter how busy you may be.
Ingredients
– 1 cup (2 sticks) unsalted butter
– 2 cups granulated sugar
– 4 large eggs
– 1 teaspoon vanilla extract
– 1 cup all-purpose flour
– 1 cup unsweetened cocoa powder
– 1/2 teaspoon salt
– 1/2 teaspoon baking powder
– 1 cup semi-sweet chocolate chips (optional)
– 1/2 cup chopped nuts (optional)
Step-by-Step Instructions
Creating Classic Homemade Brownies is a straightforward process. Just follow these simple steps to achieve brownie perfection:
1. Preheat the Oven: Start by preheating your oven to 350°F (175°C). Grease a 9×13-inch baking pan or line it with parchment paper for easier removal.
2. Melt the Butter: In a saucepan, melt the butter over low heat. Once melted, remove from heat and allow to cool slightly.
3. Mix Sugar and Butter: In a mixing bowl, combine the melted butter and granulated sugar. Stir until well blended.
4. Add Eggs and Vanilla: Beat in the eggs, one at a time, followed by the vanilla extract. Ensure the mixture is smooth.
5. Combine Dry Ingredients: In another bowl, whisk together the flour, cocoa powder, salt, and baking powder.
6. Combine Wet and Dry: Gradually add the dry ingredients into the wet mixture, stirring just until combined.
7. Add Chocolate Chips and Nuts: If desired, fold in the semi-sweet chocolate chips and chopped nuts.
8. Pour into Pan: Transfer the batter into the prepared baking pan, spreading it evenly with a spatula.
9. Bake: Place in the preheated oven and bake for 25–30 minutes. A toothpick inserted in the center should come out with a few moist crumbs but not wet batter.
10. Cool: Remove from the oven and let the brownies cool in the pan for about 20 minutes before slicing.
By following these steps, you’ll create a batch of tempting brownies that are sure to impress!
How to Serve
To elevate your serving experience of Classic Homemade Brownies, consider the following tips:
1. Presentation: Cut the brownies into squares and arrange them on a beautiful platter. Dust with powdered sugar for a touch of elegance.
2. Accompaniments: Serve with a dollop of whipped cream, a scoop of vanilla ice cream, or a drizzle of chocolate sauce to enhance their richness.
3. Flavor Pairings: Pair brownies with coffee or dessert wine for a sophisticated touch.
4. Storing: Keep any leftovers in an airtight container at room temperature for up to four days, or refrigerate them for longer freshness.
These simple serving suggestions will help you turn a delightful brownie experience into a remarkable one, perfect for any gathering or occasion!
Additional Tips
– Use Quality Ingredients: The foundation of great Classic Homemade Brownies lies in the ingredients. Opt for high-quality unsweetened cocoa and real vanilla extract to elevate the flavor profile.
– Don’t Overmix: When combining the wet and dry ingredients, mix just until combined. Overmixing can lead to tough brownies.
– Allow to Cool: Patience is key—allow your brownies to cool completely before cutting. This helps them set and ensures clean, even slices.
– Taste Test: For a richer flavor, consider adding a pinch of sea salt on top before baking. This adds depth to the sweetness and enhances the chocolate flavor.
– Experiment with Toppings: Top your brownies with caramel sauce, sea salt, or coconut for a delightful twist.
Recipe Variation
Get creative with your Classic Homemade Brownies! Here are some fun variations to try:
1. Peppermint Twist: Add a teaspoon of peppermint extract to the batter for a festive touch. Top with crushed candy canes for added flair.
2. Blondies Option: Swap out the cocoa powder for brown sugar and white chocolate chips for a lighter, blondie version.
3. Mocha Brownies: Mix in a tablespoon of instant espresso powder to the batter for a delightful coffee-forward flavor.
4. Nutty Brownies: Fold in different types of nuts, such as walnuts, pecans, or hazelnuts, for an added crunch.
5. Swirled Cream Cheese: Create a cream cheese swirl by mixing cream cheese with sugar and vanilla, then swirling it into the brownie batter before baking.
Freezing and Storage
– Storage: Keep your brownies in an airtight container at room temperature for up to four days. They can also be refrigerated for longer freshness.
– Freezing: For extended storage, wrap individual brownie squares in plastic wrap and place them in a freezer bag. They can be frozen for up to three months. Simply thaw at room temperature before enjoying.
Special Equipment
To ensure your Classic Homemade Brownies turn out perfectly, gather the following equipment:
– Mixing Bowls: For combining ingredients effectively.
– Spatula: A flexible spatula helps in spreading and smoothing the batter in the baking pan.
– Measuring Cups and Spoons: Precision in measuring ingredients is crucial for baking success.
– Whisk: To thoroughly mix dry ingredients together.
– 9×13 Inch Baking Pan: The standard size for this brownie recipe.
– Cooling Rack: Allows your brownies to cool evenly after baking.
Frequently Asked Questions
1. Can I double this recipe?
Yes, you can double the ingredients and use a larger baking pan. Just remember to adjust the baking time accordingly.
2. What if I don’t have cocoa powder?
If you’re out of cocoa powder, you can substitute it with an equal amount of melted dark chocolate for a different but equally delicious result.
3. Can I make these dairy-free?
Yes! Substitute the butter with coconut oil or a vegan butter alternative, and ensure you use dairy-free chocolate chips if desired.
4. How can I tell when the brownies are done?
Insert a toothpick in the center; it should come out with a few moist crumbs attached, but no wet batter should remain.
5. Can these brownies be made gluten-free?
Certainly! Simply replace all-purpose flour with a 1:1 gluten-free flour blend for a gluten-free version.
Conclusion
Classic Homemade Brownies are more than just a dessert; they are an experience that brings comfort and joy to any occasion. With their rich, fudgy texture and deep chocolate flavor, they are sure to become a favorite in your baking repertoire. The ease of preparation combined with the ability to customize makes them a versatile addition to your dessert table. Whether enjoyed on their own or dressed up with toppings, these brownies represent a timeless treat that everyone can appreciate. So gather your ingredients, follow the steps, and indulge in the deliciousness of homemade brownies—you won’t regret it!