Greek Yogurt Fruit Pizza
Highlighted under: Gourmet Baking Bliss
Bright and colorful, this Greek Yogurt Fruit Pizza looks like a cheerleader for summer on your table. The creamy yogurt base, topped with fresh seasonal fruits, just begs to be enjoyed. It's one of those recipes that brings instant joy, whether you're having a casual picnic or just a lazy afternoon at home. I first made this when the farmers market was bursting with strawberries, blueberries, and peaches, and my family couldn't get enough of it.
One afternoon, feeling a bit sluggish from the heat, I wanted something refreshing but also a bit special. That's when I thought about my trusty pizza stone left unused for a while. Honestly, turning it into a sweet treat was a stroke of genius. After flattening out some dough, I spread a thick layer of creamy Greek yogurt, then got to the fun part—arranging all the fresh fruits. You know how when you try to look fancy, you end up with a fruit explosion? Yeah, that happened.
What I discovered about this recipe is how versatile it is. You can switch up the yogurt flavor (I sometimes use vanilla for added sweetness), or grab whatever fruit you have in the fridge. You really can't go wrong here. If ever I feel ambitious, I’ll sprinkle some granola on top for an extra crunch. This pizza always makes an appearance at summer gatherings, and who could resist a slice?
Key Technique for Greek Yogurt Fruit Pizza
When you bake the pizza crust, don't rush it. Keep an eye on that golden brown color. If you pull it out too early, it can become soggy under the yogurt layer later. I find that 10 minutes is usually enough, but every oven can be a little different, so trust your instincts. A perfectly baked crust holds everything together nicely.
Spreading the yogurt evenly is a small but important detail. It should go all the way to the edges to help prevent the toppings from sliding off. I like to use a spatula for this—it makes it much easier to get an even layer. Plus, it looks so much nicer when you're done.
Swaps & Substitutions
If you’re not a fan of Greek yogurt, you can swap in any thick yogurt you like. Personally, I’ve even used a coconut yogurt which gives it a fun twist, especially with tropical fruits. Just make sure whatever you pick has a nice, creamy consistency to hold up under the fruits.
As for the toppings, you can mix and match based on what’s in season or what you have at home. I often use kiwi instead of peaches or even add in some pomegranate seeds for a nice crunch. If you’re feeling adventurous, a drizzle of chocolate sauce over the top could be a delicious finishing touch!
Ingredients
For the Pizza Base
- 1 pre-made pizza crust (I use Boboli)
- 1 tablespoon olive oil
For the Yogurt Layer
- 1 cup plain Greek yogurt (like FAGE)
- 2 tablespoons honey or maple syrup
- 1 teaspoon vanilla extract
For the Toppings
- 1 cup sliced strawberries
- 1 cup blueberries
- 1 peach, sliced
- 1 banana, sliced
- 1/4 cup granola (optional)
Instructions
Prepare the Pizza Base
Preheat your oven according to the instructions for your pizza crust, usually around 400 degrees Fahrenheit. Brush the crust lightly with olive oil. Pop it in the oven until it's golden brown, about 10 minutes. Keep an eye on it, because no one likes a burnt pizza.
Mix the Yogurt Layer
While the crust cools, combine the Greek yogurt, honey, and vanilla in a medium bowl. Taste the mixture—if you want it a tad sweeter, feel free to add more honey. This yogurt mix is the creamy goodness that holds everything together.
Build Your Fruit Pizza
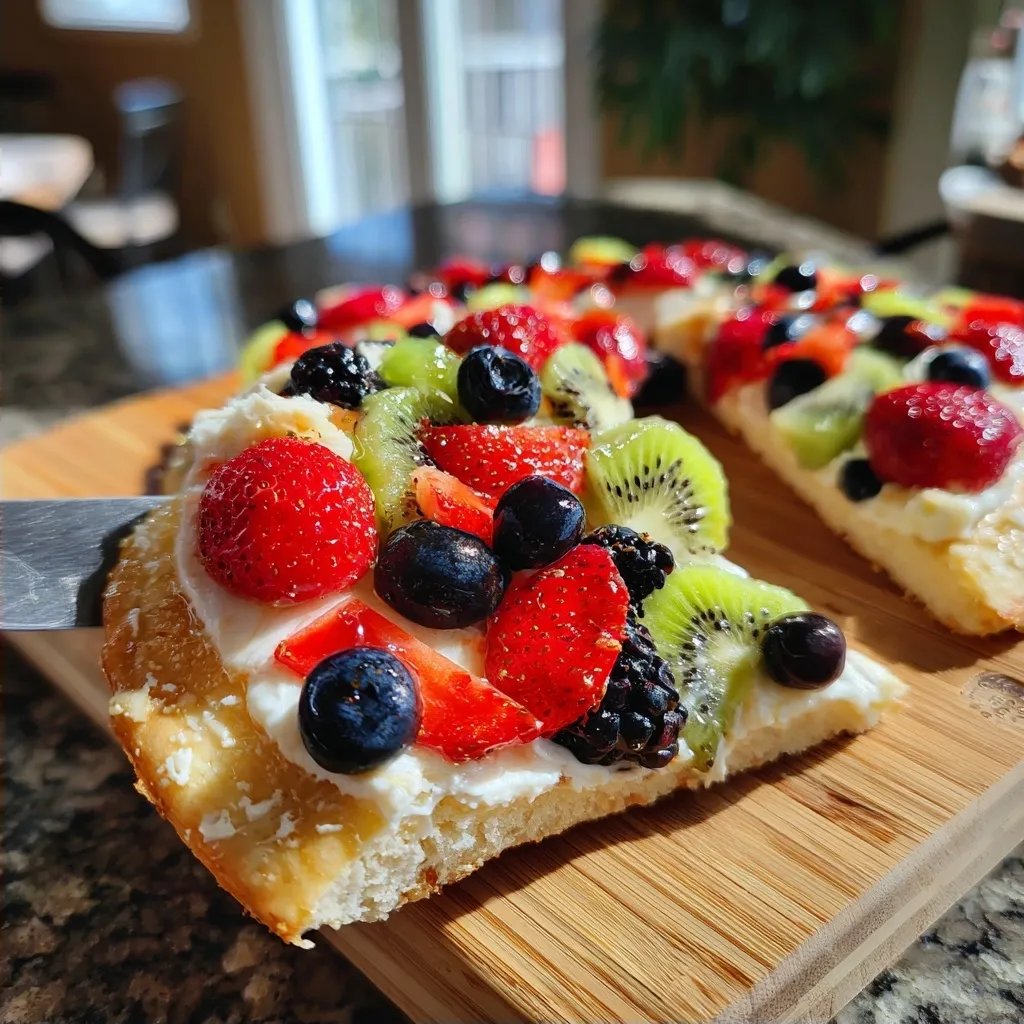
Once the crust has cooled, spread the yogurt mixture evenly over it. The yogurt should go all the way to the edges for a nice presentation. Then, starting with the berries, arrange the sliced fruit on top like you’re decorating a canvas. Don’t stress if it looks a little chaotic, that’s part of the charm.
Serve and Enjoy
If you're using granola, sprinkle it over at the end. Cut the pizza into slices (I usually get around 8) and serve. It’s a colorful treat that will definitely bring smiles. You can refrigerate any leftovers, but trust me, they won't last long!
How to Store Greek Yogurt Fruit Pizza
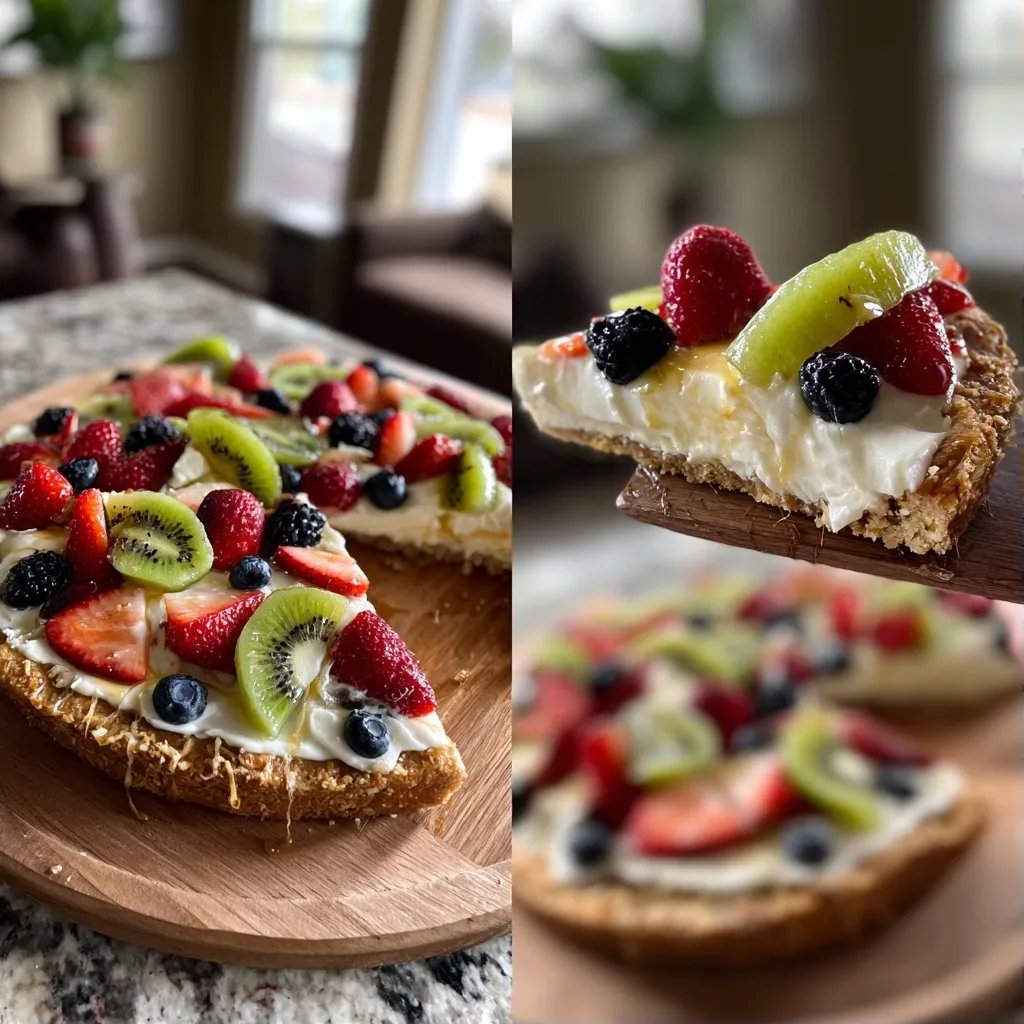
After enjoying your fruit pizza, any leftovers can be stored in the refrigerator, just be sure to cover it lightly with plastic wrap to keep it fresh. I usually place it in a shallow container so the toppings don’t get squished. It’s best enjoyed in the first couple of days, but honestly, that’s rarely a problem in my house.
If you find that the yogurt layer starts to make the crust a bit soggy, simply serve the leftovers with fresh fruit on top. I do this when I want to revive that crunch in the crust.
Ways to Switch It Up
Feeling like getting creative? Try adding a layer of peanut butter or almond butter beneath the yogurt. This adds richness and a different kind of nutty goodness. Just make sure to spread it evenly, so it doesn't overwhelm the yogurt too much.
You can also experiment with spices. A sprinkle of cinnamon over the yogurt layer can bring a warm twist, especially if you’re using bananas or apples as toppings. Just remember to taste along the way. Sometimes, simple changes can lead to delightful surprises.
Greek Yogurt Fruit Pizza
Created by: The Tastycrafter Team
Recipe Type: Gourmet Baking Bliss
Skill Level: Easy
Final Quantity: 8 slices
What You'll Need
For the Pizza Base
- 1 pre-made pizza crust (I use Boboli)
- 1 tablespoon olive oil
For the Yogurt Layer
- 1 cup plain Greek yogurt (like FAGE)
- 2 tablespoons honey or maple syrup
- 1 teaspoon vanilla extract
For the Toppings
- 1 cup sliced strawberries
- 1 cup blueberries
- 1 peach, sliced
- 1 banana, sliced
- 1/4 cup granola (optional)
How-To Steps
Preheat your oven according to the instructions for your pizza crust, usually around 400 degrees Fahrenheit. Brush the crust lightly with olive oil. Pop it in the oven until it's golden brown, about 10 minutes. Keep an eye on it, because no one likes a burnt pizza.
While the crust cools, combine the Greek yogurt, honey, and vanilla in a medium bowl. Taste the mixture—if you want it a tad sweeter, feel free to add more honey. This yogurt mix is the creamy goodness that holds everything together.
Once the crust has cooled, spread the yogurt mixture evenly over it. The yogurt should go all the way to the edges for a nice presentation. Then, starting with the berries, arrange the sliced fruit on top like you’re decorating a canvas. Don’t stress if it looks a little chaotic, that’s part of the charm.
If you're using granola, sprinkle it over at the end. Cut the pizza into slices (I usually get around 8) and serve. It’s a colorful treat that will definitely bring smiles. You can refrigerate any leftovers, but trust me, they won't last long!
Nutritional Breakdown (Per Serving)
- Calories (kcal): 179
- Total Fat (g): 7.3
- Saturated Fat (g): 2.5
- Cholesterol (mg): 10
- Sodium (mg): 200
- Total Carbohydrates (g): 25.4
- Dietary Fiber (g): 2.9
- Sugars (g): 9.5
- Protein (g): 5.6