Olive Garden Breadsticks Recipe: An Incredible Ultimate Guide
Olive Garden Breadsticks Recipe brings the delightful taste of the iconic restaurant right into your kitchen. If you’ve ever dined at Olive Garden, chances are you couldn’t resist the warm, soft, and buttery breadsticks that are served fresh at your table. These breadsticks are more than just a side; they are a comforting appetizer that sets the stage for your meal. With this incredible recipe, you can recreate this beloved dish, ensuring that every bite is as satisfying as the last. Imagine the aroma wafting through your home as you prepare these ultimate breadsticks—it’s sure to make your mouth water!
Crafting the perfect breadstick might seem daunting, but it’s easier than you think. This recipe encapsulates the warmth and inviting nature of Olive Garden’s breadsticks, bringing a slice of Italian-American cuisine to your dining table. Let’s dive into why this breadstick recipe is a must-try!
Why You’ll Love This Recipe
The Olive Garden Breadsticks Recipe stands out for several reasons that will undoubtedly persuade you to make them a part of your routine. Here’s why you’ll fall head over heels for these delicious breadsticks:
1. Quick and Easy: The breadstick preparation does not take hours. You can make them in under an hour without needing professional baking skills.
2. Homemade Flavor: There’s nothing quite like the taste of freshly baked breadsticks. Homemade breadsticks bring a warmth that store-bought cannot.
3. Versatile Pairing: They are perfect with any meal—Italian dishes, soups, or salads. Furthermore, these breadsticks are excellent on their own.
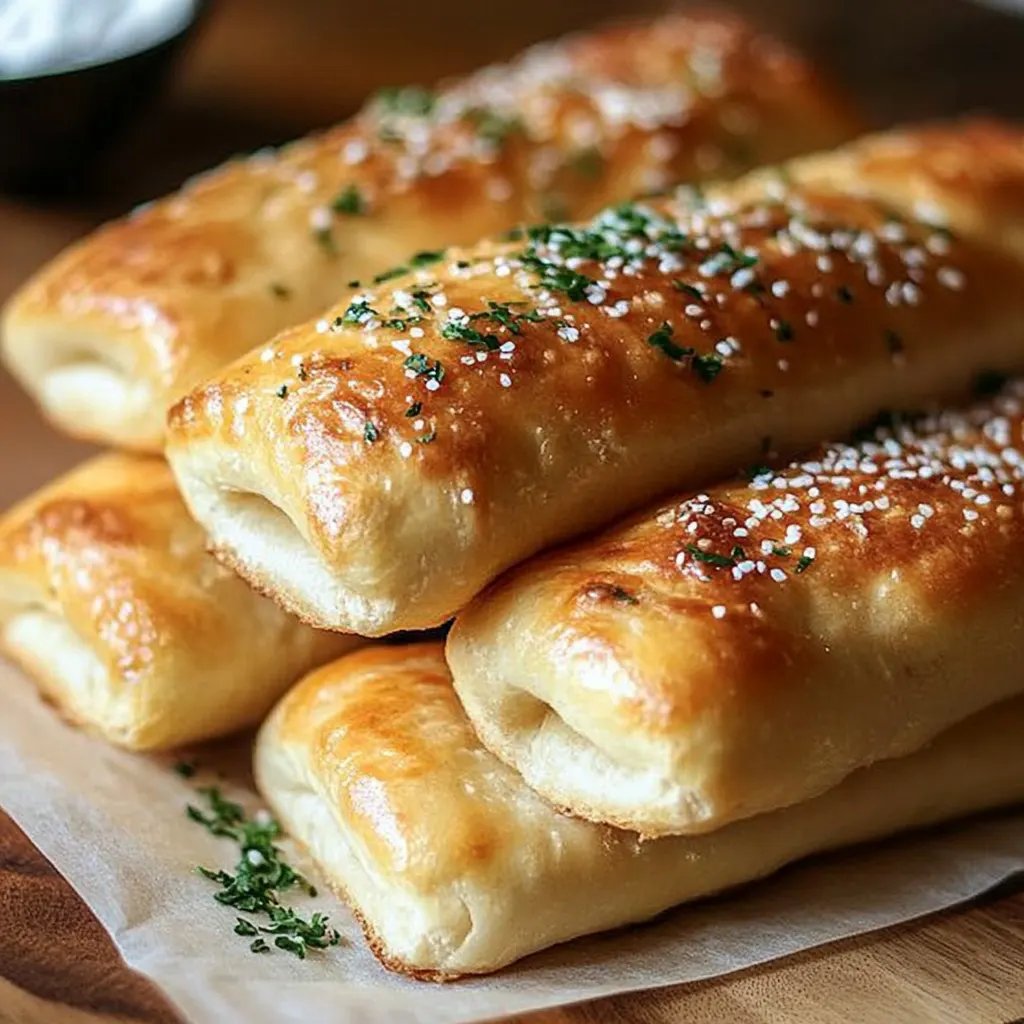
4. Satisfying and Filling: Soft, fluffy, and brushed with garlic butter, these breadsticks are indulgent yet comforting.
5. Kid-Friendly: Kids love breadsticks, and this recipe is simple enough for little ones to help with!
6. Great for Sharing: These breadsticks are an ideal side dish for gatherings, ensuring everyone leaves the table with a smile.
Overall, it’s clear that this Olive Garden Breadsticks Recipe is bound to become a household favorite, cherished by everyone who has the pleasure of indulging.
Preparation and Cooking Time
Time is essential in any kitchen. The Olive Garden Breadsticks Recipe takes approximately 30-40 minutes in total—perfect for a quick weekday meal. Here’s a detailed breakdown of the time required:
– Preparation Time: Approximately 10-15 minutes
– Rising Time: 20 minutes
– Cooking Time: 10-15 minutes
These times can vary based on your experience and kitchen conditions. However, this timeline provides a helpful framework to expect.
Ingredients
– 2 ¼ teaspoons active dry yeast
– 1 cup warm water (about 110°F)
– 2 tablespoons granulated sugar
– 3 tablespoons vegetable oil
– 1 teaspoon salt
– 2 ½ to 3 cups all-purpose flour
– 4 tablespoons unsalted butter, melted
– 1 teaspoon garlic powder
– ½ teaspoon ground oregano
– ½ teaspoon salt (for topping)
– Optional: fresh parsley, chopped (for garnish)
Step-by-Step Instructions
Creating your own Olive Garden Breadsticks is a rewarding experience. Just follow these step-by-step instructions to achieve the perfect breadsticks:
1. Activate Yeast: In a mixing bowl, combine warm water, sugar, and yeast. Allow resting for about 5-10 minutes, or until the mixture becomes frothy.
2. Mix Wet Ingredients: Stir in vegetable oil and salt into the yeast mixture.
3. Incorporate Flour: Gradually add in 2 ½ cups of flour, stirring until the dough begins to form. You may need to add more flour if it’s still sticky.
4. Knead Dough: Transfer the dough to a floured surface and knead for about 5 minutes until smooth and elastic.
5. Second Rise: Place the dough in a greased bowl. Cover with a clean kitchen towel or plastic wrap, then let it rise in a warm area for about 20 minutes, or until doubled in size.
6. Preheat Oven: While the dough is rising, preheat your oven to 400°F (200°C).
7. Shape Breadsticks: Once the dough has risen, punch it down and transfer it to a floured surface. Divide into 12 equal pieces and roll each piece into a long strip (about 6-8 inches).
8. Arrange on Baking Sheet: Place the shaped strips on a greased baking sheet, spacing them about an inch apart.
9. Brush with Butter: Mix melted butter with garlic powder and oregano, then brush this mixture generously over the breadsticks.
10. Final Bake: Bake the breadsticks in the preheated oven for 10-15 minutes until golden brown.
11. Add Topping: Remove from the oven, sprinkle with salt, and brush again with the garlic butter mixture.
12. Cool Slightly: Allow breadsticks to cool for a few minutes before serving.
Making these breadsticks can seem like a delightful adventure, and the results are well worth the effort—trust us!
How to Serve
Once your Olive Garden Breadsticks are perfectly baked, it’s time to think about how to serve them to create the best experience for your guests or family:
1. Presentation Matters: Serve the breadsticks on a large platter or basket, lined with a decorative cloth for an enticing presentation.
2. Dipping Sauce: Pair them with marinara sauce, garlic butter, or Alfredo sauce for dipping options that elevate the taste.
3. Accompaniments: Serve alongside your favorite pasta dishes or salads. They work wonderfully as a side to enhance the overall meal.
4. Garnish: Sprinkle fresh chopped parsley over the breadsticks for a pop of color and an added flavor profile.
5. Temperature: Serve warm for the best taste and texture. If you have leftovers, gently reheat them in the oven or microwave.
By putting thought into how you serve these incredible breadsticks, you personalize the dining experience and create a joyful atmosphere that celebrates delicious homemade food!
Additional Tips
– Use Warm Water: Make sure your water is warm, around 110°F, to effectively activate the yeast.
– Don’t Skip Rising: Allow the dough to rise until it has doubled in size. This ensures soft and fluffy breadsticks.
– Brush Generously: The garlic butter mixture can be brushed on before and after baking for a stronger flavor.
– Experiment with Seasonings: Feel free to add your favorite spices or herbs to the garlic butter for a unique twist.
Recipe Variation
There are various ways to customize your Olive Garden Breadsticks. Here are some exciting variations:
1. Cheese-Stuffed Breadsticks: Roll mozzarella cheese into the dough before shaping for cheesy goodness.
2. Herb-Infused: Mix fresh or dried herbs into the dough, such as rosemary or thyme, for a fragrant alternative.
3. Sweet Cinnamon Breadsticks: Replace garlic seasoning with cinnamon sugar for a dessert-style breadstick.
Freezing and Storage
– Storage: Keep any leftover breadsticks in an airtight container at room temperature for up to two days.
– Freezing: You can freeze unbaked breadsticks. Shape them, place them on a baking sheet to freeze, then transfer to a freezer bag. They can last for up to three months. When ready to cook, bake them straight from the freezer, adding a few extra minutes.
Special Equipment
Preparing Olive Garden Breadsticks requires minimal equipment. Here’s what you’ll need:
– Mixing bowl
– Rolling pin
– Baking sheet
– Kitchen towel for covering the dough
– Pastry brush for applying the garlic butter
Frequently Asked Questions
Can I use instant yeast instead of active dry yeast?
Yes, instant yeast can be used without proofing it first; just mix it directly with dry ingredients.
What if my breadsticks don’t rise?
Ensure that the yeast is fresh and your environment is warm. Try placing the dough in an oven with the light on.
Can I use whole wheat flour instead of all-purpose flour?
Yes, you can substitute whole wheat flour, but you may need to add a bit more water to achieve the right consistency.
How can I achieve a crunchier texture?
For crunchier breadsticks, bake a few minutes longer or place them under the broiler for the last minute.
Conclusion
The Olive Garden Breadsticks Recipe is truly a treat that brings warmth and comfort to any meal. With their soft, buttery texture and delicious garlic flavor, they are bound to impress family and friends alike. By following this guide, you not only recreate a beloved restaurant classic but also add a personal touch to the experience. Enjoy these breadsticks fresh from the oven, dipped in your favorite sauces, and served alongside delicious dishes!